> ## Documentation Index
> Fetch the complete documentation index at: https://docs.pixldata.com/llms.txt
> Use this file to discover all available pages before exploring further.
# Cuboid Tool
> Draw pseudo-3D cuboid annotations on 2D images in PixlHub: two clicks for the front face, one for depth, Enter to finish.
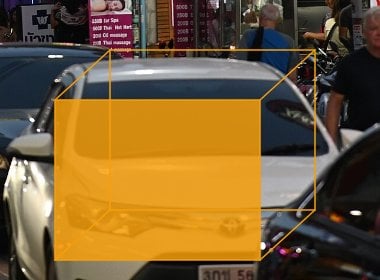
Some models need more than a flat rectangle: vehicle pose, parcel dimensions, furniture orientation. The Cuboid tool draws a pseudo-3D box on a 2D image: a front face plus projected depth edges, giving downstream models the geometry a bounding box throws away.
Cuboids annotate perspective on flat images. For true 3D boxes on point clouds, that is the LiDAR editor's territory with a dedicated project type.
## Draw a cuboid
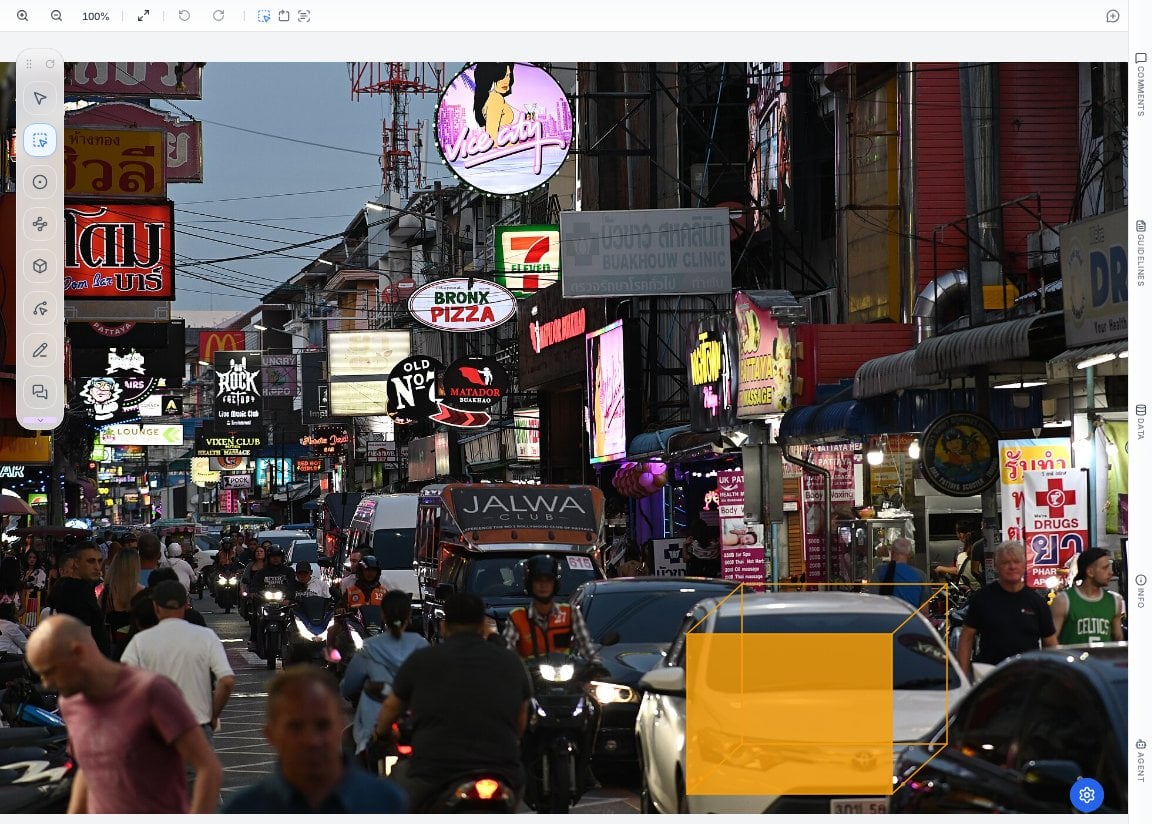
Press the class hotkey, then click the cuboid icon in the floating palette.
Click one corner of the object's front face, then the opposite corner, exactly like the two corners of a bounding box.
Move toward the object's receding direction; the preview extends the depth edges. Click to set the depth point.
Enter completes the cuboid, and it joins Object Instances like any other annotation.
 ## Getting the geometry right
* **Front face on the visible face.** Put the rectangle on the surface facing the camera (a car's front or rear); the depth edges then follow the body naturally.
* **Depth follows the vanishing direction.** Drag depth along the object's real-world axis, using lane lines, shelf edges or building lines as perspective references.
* **Edit like everything else.** Select the cuboid and its handles expose both face corners and depth for adjustment; reclassify with a hotkey, delete with Del, undo per operation.
## Getting the geometry right
* **Front face on the visible face.** Put the rectangle on the surface facing the camera (a car's front or rear); the depth edges then follow the body naturally.
* **Depth follows the vanishing direction.** Drag depth along the object's real-world axis, using lane lines, shelf edges or building lines as perspective references.
* **Edit like everything else.** Select the cuboid and its handles expose both face corners and depth for adjustment; reclassify with a hotkey, delete with Del, undo per operation.
 ## When cuboid beats box
| Situation | Reason |
| -------------------------------------------------------- | ---------------------------------------------------------------- |
| Vehicle orientation matters (parking, traffic direction) | The depth edges encode heading |
| Parcel and box measurement pipelines | Three visible dimensions instead of two |
| Shelf-depth or furniture placement tasks | Perspective is the signal, not noise |
| Plain detection with no pose need | Skip it, a [bounding box](/guides/basics/bounding-box) is faster |
## Frequently asked questions
It is perspective-annotated 2D: a front face plus a projected depth, in image coordinates. Genuinely metric 3D comes from LiDAR projects, where annotation happens in a point cloud.
With their full geometry (face and depth points), alongside other annotation types; downstream code reads them as eight-point projections. See Exports.
## Next steps
The flat sibling, for when pose does not matter.
The full tour of tools and panels.
## When cuboid beats box
| Situation | Reason |
| -------------------------------------------------------- | ---------------------------------------------------------------- |
| Vehicle orientation matters (parking, traffic direction) | The depth edges encode heading |
| Parcel and box measurement pipelines | Three visible dimensions instead of two |
| Shelf-depth or furniture placement tasks | Perspective is the signal, not noise |
| Plain detection with no pose need | Skip it, a [bounding box](/guides/basics/bounding-box) is faster |
## Frequently asked questions
It is perspective-annotated 2D: a front face plus a projected depth, in image coordinates. Genuinely metric 3D comes from LiDAR projects, where annotation happens in a point cloud.
With their full geometry (face and depth points), alongside other annotation types; downstream code reads them as eight-point projections. See Exports.
## Next steps
The flat sibling, for when pose does not matter.
The full tour of tools and panels.