
The editor opens when you click Start Labeling on any image project, or open a task directly. What you can do inside depends on your project role: labelers annotate, reviewers accept or reject, and managers can do both.
The layout at a glance
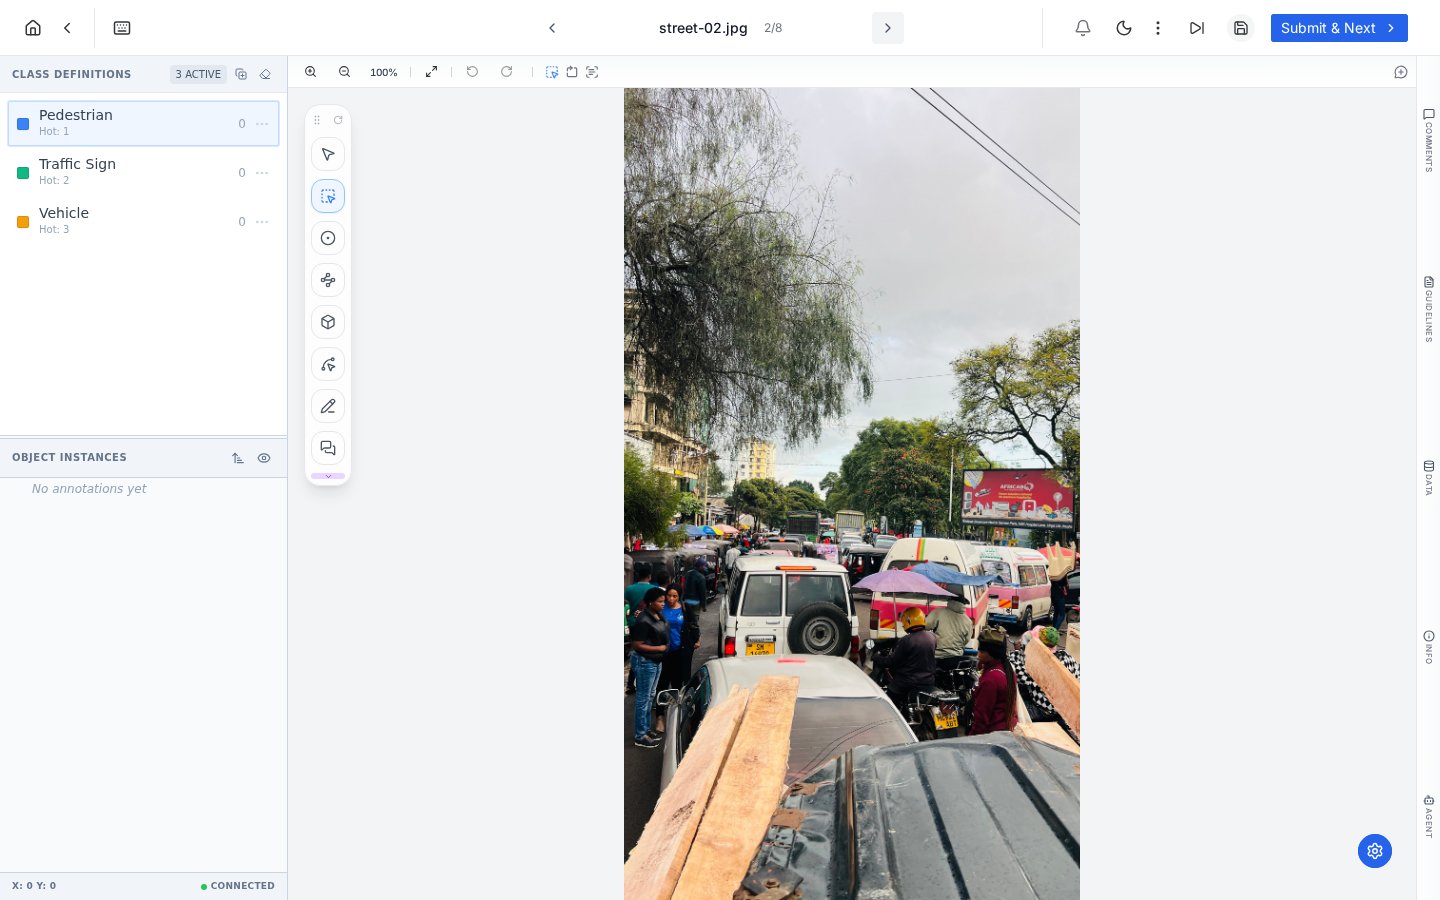
The image editor: class definitions and object instances on the left, canvas and floating tool palette in the center, context tabs on the right rail.
The top bar carries task navigation (previous/next, task counter), the zoom and fit controls, undo and redo, and the save and submit actions. The status bar at the bottom shows live cursor coordinates and the size of the shape you are drawing.
Pick a tool
The floating palette holds the annotation tools. Drag its handle to move it anywhere on the canvas.
The tool palette. From top: Select, Bounding Box, Point, Polygon, Cuboid, Line, Freeform and Comment.
An AI Tools section expands below the palette with model-assisted options; see AI-assisted annotation for how pre-labeling works.
Work with classes and hotkeys
Every class in your schema has a hotkey number. The loop that keeps annotation fast:- Press the hotkey (or click the class) to arm it.
- Draw with the active tool. The annotation takes the armed class automatically.
- Check the running count next to each class name to track coverage.
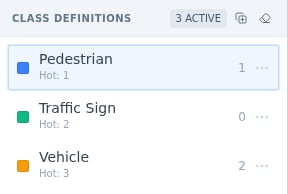
Class hotkeys in the left panel. Press 1, 2 or 3 to switch classes without touching the mouse.
Keep large tasks organized
Dense scenes accumulate dozens of objects. The Object Instances panel is how you stay oriented: every annotation is listed with its class color and ID, and each row has an eye toggle to hide the shape and a lock to protect it from accidental edits. Selecting a row highlights the shape on canvas, and a right-click opens the same context actions you get on the canvas itself.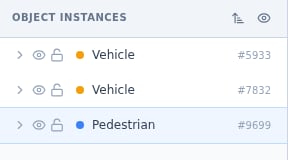
Object instances with per-object visibility and lock controls.
Save, submit, or skip
The header offers distinct actions, and the difference matters for your workflow:- Save annotations only stores progress without moving the task. The task stays yours.
- Submit & Next completes the task, sends it into the Review step, and loads the next queued task.
- Skip this task passes the task without completing it, for images you cannot judge.
- Copy from previous task pulls the previous task’s annotations in, useful for near-duplicate frames.
- Clear all annotations wipes the canvas for a fresh start.
The right rail
Six tabs keep task context one click away without leaving the editor: Comments (threaded discussion on the task, including pinned comments from the Comment tool), Guidelines (the project instructions, so labelers never annotate from memory), Data (asset details), Info (task metadata and history), Agent (the AI assistant panel) and Canvas Settings (border widths, label rendering and other display preferences, covered in Canvas Settings).Troubleshooting
My shortcut keys do nothing
My shortcut keys do nothing
Click once anywhere on the canvas first. Keyboard shortcuts require the editor surface to have focus, so a stray click in a side panel can capture your keystrokes.
I drew a box but it has the wrong class
I drew a box but it has the wrong class
Select it with the Select tool and press the correct class hotkey, or right-click the instance in the Object Instances panel to reassign it. Arming the right class before drawing is faster than fixing afterward.
The canvas feels cluttered
The canvas feels cluttered
Use the eye toggles in Object Instances to hide finished objects, or the global Hide all objects control in the canvas toolbar. Zoom with the controls in the top bar or your scroll wheel, and Fit to Screen resets the view.
Next steps
Bounding boxes in depth
The three box variants and precise drawing technique.
AI-assisted annotation
Let models propose labels; you correct instead of drawing from scratch.