
Available in image projects. A line is a polyline: two clicks make a straight segment, more clicks trace a path. Lines share classes, hotkeys and the instance list with every other annotation type.
Draw a line
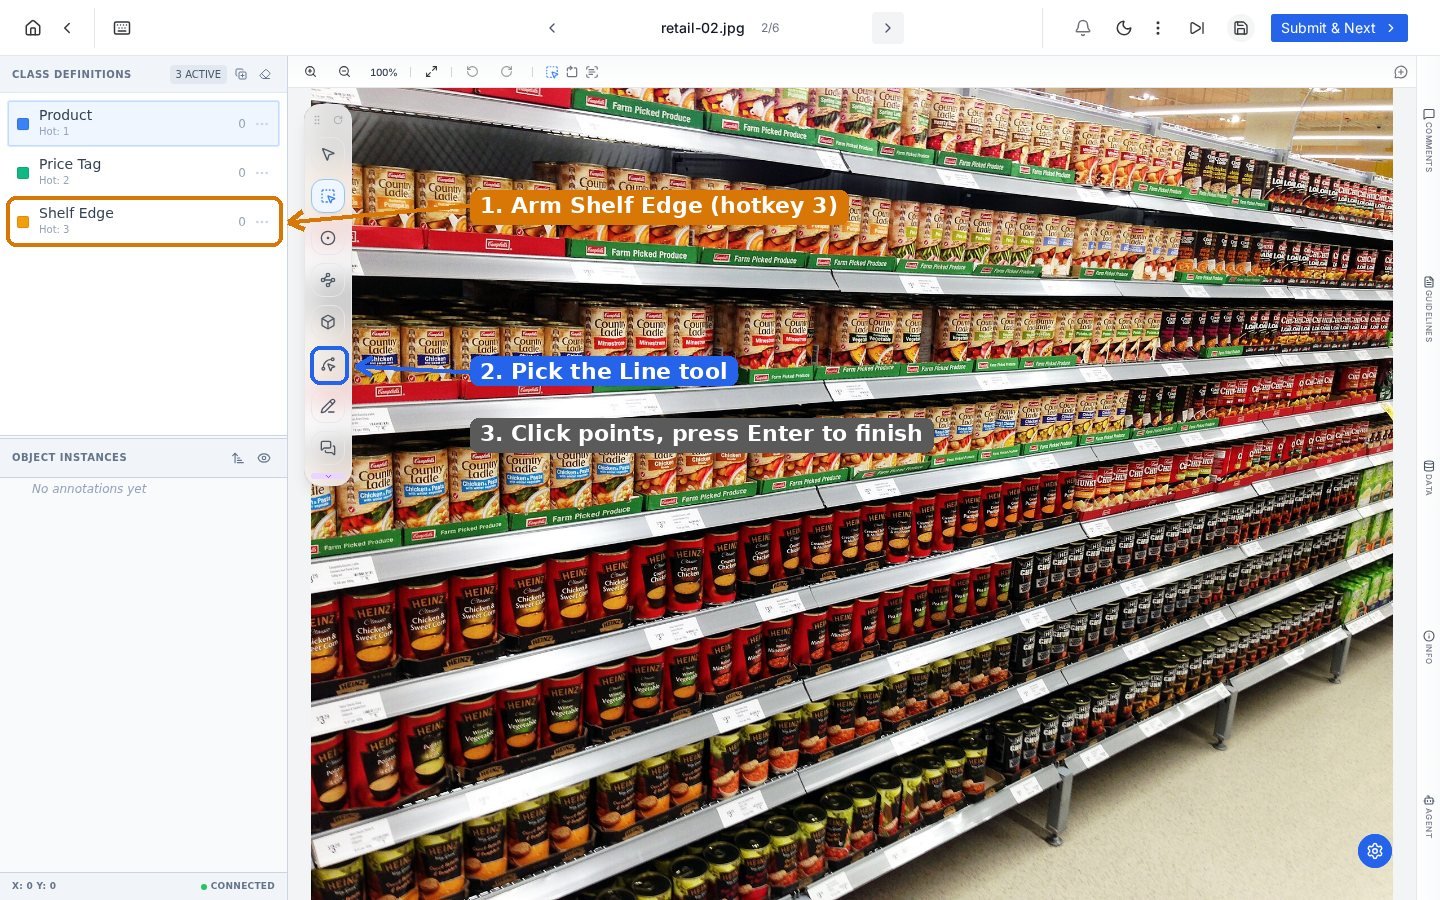
Supermarket example: the Shelf Edge class armed, the Line tool picked, and the finish rule worth memorizing.
1
Arm the class
Press the class hotkey (Shelf Edge is 3 in this project) or click the class name.
2
Pick the Line tool
Click the line icon in the floating palette.
3
Click along the structure
Each click drops a vertex; a dashed preview follows your cursor between clicks. Trace the edge with as many vertices as its curvature needs.
4
Press Enter to finish
Enter completes the polyline. This is the detail everyone misses on day one: lines are open shapes, so there is no first vertex to double-click back to.

The finished polyline hugs the shelf rail through perspective; the class chip and instance entry appear like any other annotation.
Edit a line
Select the line with the Select tool and its vertices become draggable handles, exactly like polygon vertices. Drag to refine the path, press a different hotkey to reclassify, Delete to remove. Undo steps back through individual vertex operations.Technique notes
- Vertices where the direction changes. A straight rail needs two; a curving lane needs one per bend. Extra vertices on straight runs add noise, not precision.
- Perspective is normal. Structures that recede (like this shelf) are the tool’s home ground; place vertices at consistent visual landmarks such as shelf-lip corners.
- Zoom for the endpoints. Where a line starts and stops is usually a guideline decision; zoom in at both ends so the cutoff is deliberate.
Frequently asked questions
Line or polygon for something like a road marking?
Line or polygon for something like a road marking?
If the model needs the centerline or trajectory, use a line. If it needs the painted area itself (for segmentation), outline it with a polygon.
Can I continue a line after pressing Enter?
Can I continue a line after pressing Enter?
No, Enter seals the shape. Draw a second line and keep them under the same class, or delete and redraw if it must be one continuous path.
How do lines export?
How do lines export?
As ordered vertex lists with class and metadata, so downstream code can treat them as polylines or sample them into points. Details in Exports.
Next steps
Polygon tool
Closed outlines for regions instead of paths.
Freeform tool
Continuous freehand drawing when clicking vertices is too slow.