
Available in image projects. Points share the schema with your other annotation types, so a project can mix points, boxes and polygons per class without any special setup.
Place points
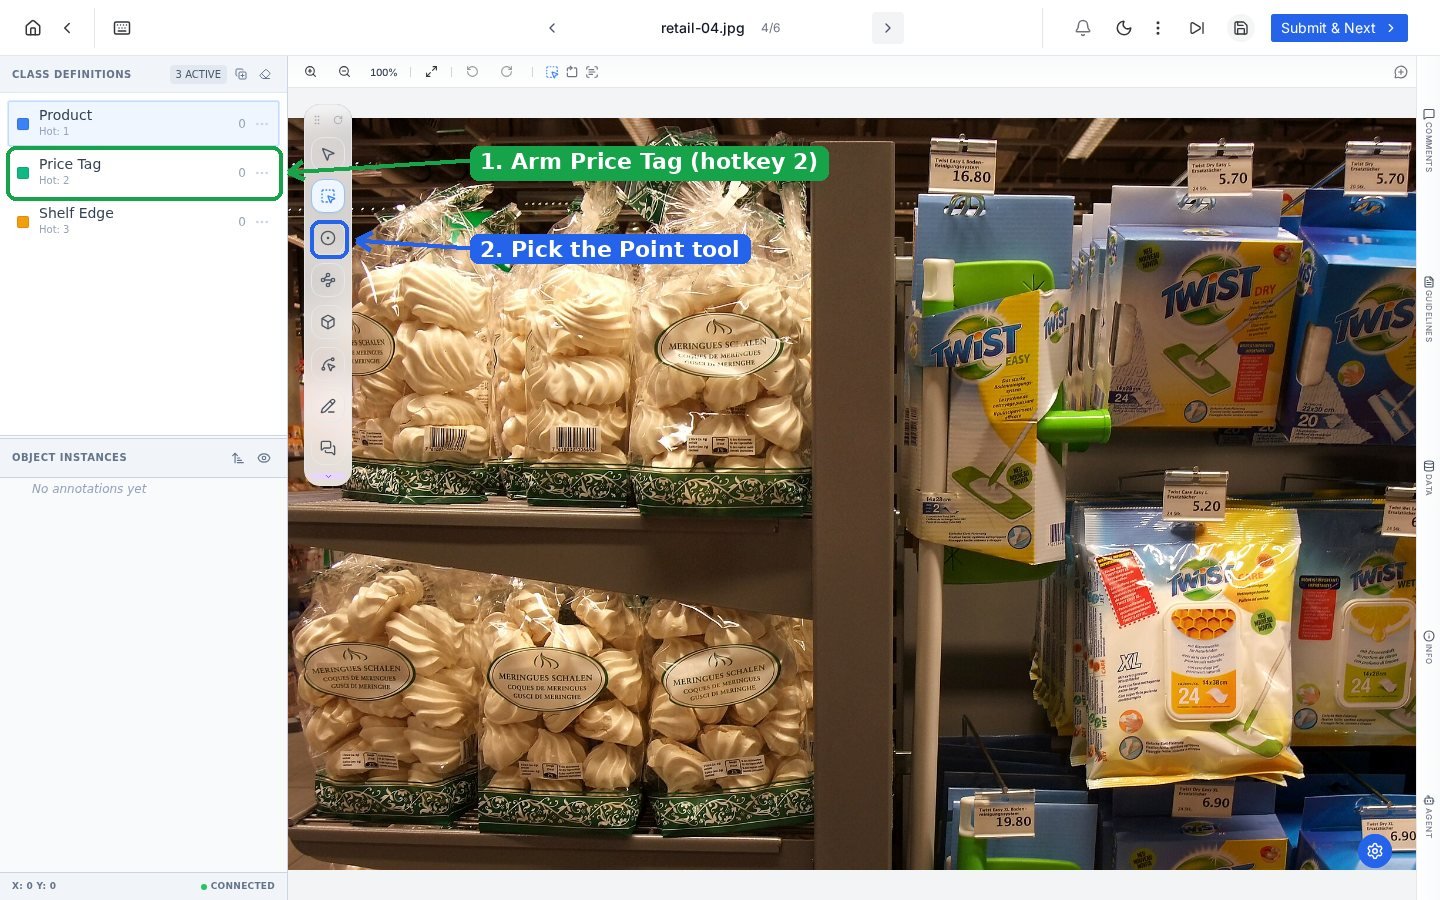
Retail example: arm the Price Tag class, pick the Point tool, then click every tag on the shelf.
1
Arm the class
Press the class hotkey or click the class in the left panel. Every point you drop takes this class until you switch.
2
Pick the Point tool
Click the point icon in the floating palette.
3
Click each location
One click, one marker. The class chip renders next to each point and every marker becomes an entry in Object Instances.
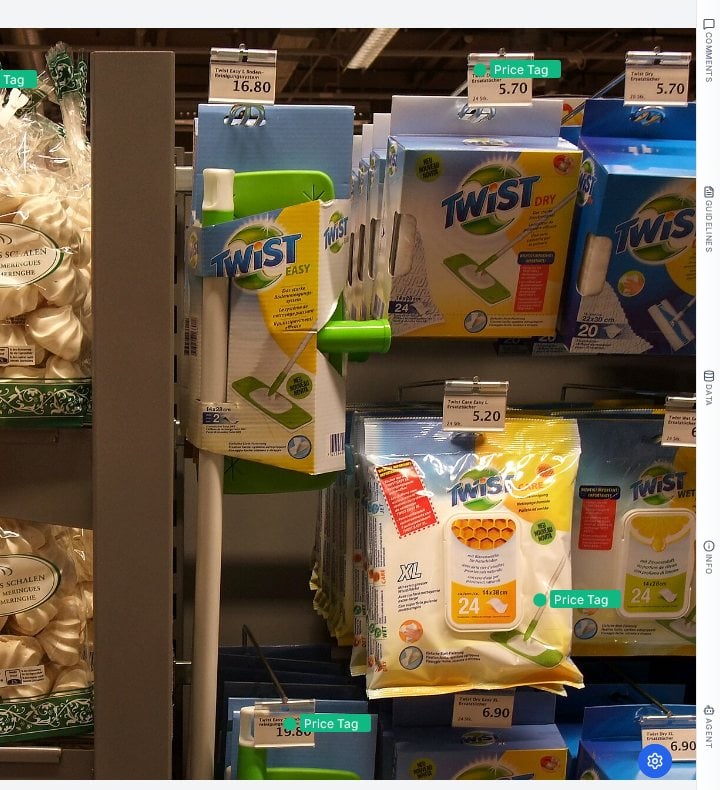
Each marker carries its class chip; the instance list keeps them selectable and countable.
Adjust and manage
- Move a point with the Select tool by dragging its marker.
- Reclassify by selecting the point and pressing another class hotkey.
- Count coverage from the class panel: the number next to each class is a live count, which is exactly what you want when guidelines say “mark every price tag”.
- Hide the clutter with the eye toggles in Object Instances when markers start covering the pixels you still need to read.
Where points earn their keep
Frequently asked questions
Can a single object carry multiple points?
Can a single object carry multiple points?
Yes. Points are independent annotations, so skeleton-style labeling (several named keypoints on one object) works by using one class per keypoint type, or attributes to distinguish them.
How do points export?
How do points export?
As x and y coordinates with class and metadata, alongside your other annotation types. See Exports for format details.
What is the fastest way to place many points of different classes?
What is the fastest way to place many points of different classes?
Work class by class: arm one hotkey, sweep the whole image for that class, then switch. Class-switching per object costs more time than a second pass.
Next steps
Bounding Box tool
When the extent matters as much as the location.
Image annotation editor
The full editor tour: panels, palette, hotkeys, saving.